POOPOO: 배변 일기 앱

이 포스팅은 CentOS 7 버전에서 진행되었습니다.
목차
- Apache 가이드 - 설치부터 HTTPS 적용까지
- Apache 가이드 - Apache Tomcat과 연동하기
- Apache 가이드 - 설정파일 분석하기
- Apache 가이드 - 로드밸런싱 설정하기
우선 Apache Tomcat이 설치되어있다는 가정 하에 포스팅을 진행하도록 하겠습니다.
설치하기
필요한 패키지 설치하기
웹 링크로부터 다운로드를 할 수 있도록 wget 패키지를 설치
# yum install -y wget
Apache와 Apache Tomcat을 연결해주는 소스를 컴파일 하기 위한 패키지를 설치
# yum install -y gcc gcc-c++ make
커넥터 다운로드
아래의 링크를 클릭하여 원하는 버전의 링크를 입력하면 커넥터의 소스를 다운을 받을 수 있습니다.
여기서는 1.2.48 버전을 사용해보겠습니다.
링크 : https://archive.apache.org/dist/tomcat/tomcat-connectors/jk/tomcat-connectors-원하는버전-src.tar.gz
# wget https://archive.apache.org/dist/tomcat/tomcat-connectors/jk/tomcat-connectors-1.2.48-src.tar.gz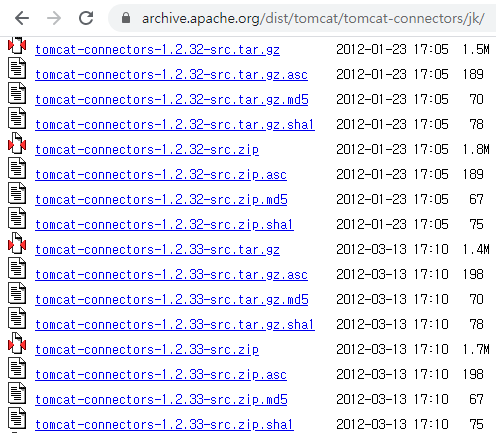
Apache와 Apache Tomcat을 연결해주는 커넥터 다운로드 링크 목록
다운받은 커넥터의 압축을 풀어줍니다.
# tar -zxvf tomcat-connectors-1.2.48-src.tar.gz
압축이 제대로 풀렸으면 tomcat-connectors-1.2.48-src 라는 폴더가 생성된 것을 확인할 수 있습니다 (명령어 : ls)
압축이 풀린 폴더 안에있는 native 폴더로 이동합니다.
# cd tomcat-connectors-1.2.48-src/native
Tip :: 컴파일 과정에 대한 의미
커넥터 컴파일 및 설치하기
아래의 명령어를 실행하면, mod_jk.so 파일이 특정 폴더에 생성됩니다.
# ./configure --with-apxs=/usr/bin/apxs
# make
# make install
생성된 mod_jk.so 파일의 경로를 찾아보기
# find / -name mod_jk.so
생성된 mod_jk.so 모듈을 복사하기
생성된 모듈을 Apache 서버 안에 있는 modules 폴더 안에 넣어줍니다.
cp 명령어의 - b 옵션은 기존 폴더에 같은 이름의 파일이 있다면, 백업파일을 자동으로 만들어줍니다.
cp 명령어의 - f 옵션은 백업파일 생성 후, 같은 이름의 파일을 제거 후 붙여넣기를 해주는 옵션입니다.
# cp -bf /usr/lib64/httpd/modules/mod_jk.so /etc/httpd/modules/mod_jk.so
환경설정파일 생성 및 수정하기
/etc/httpd/conf.modules.d/00-ssl.conf 파일의 하단에 아래의 내용을 추가합니다. (있다면 그대로 놔둡니다!)
# vi /etc/httpd/conf.modules.d/00-ssl.confLoadModule jk_module modules/mod_jk.so
/etc/httpd/conf/workers.properties 파일을 생성 후, 아래의 내용을 추가합니다.
# touch /etc/httpd/conf/workers.properties
# vi /etc/httpd/conf/workers.properties
worker.list=worker1
worker.worker1.port=8009
worker.worker1.host=localhost
worker.worker1.type=ajp13
worker.worker1.lbfactor=1
/etc/httpd/conf/httpd.conf 파일에서 해당하는 부분을 변경합니다.
# vi /etc/httpd/conf/httpd.confNameVirtualHost *:443
<VirtualHost *:443>
ServerName localhost
SSLEngine on
SSLCertificateFile /etc/pki/tls/certs/ssl.crt
SSLCertificateKeyFile /etc/pki/tls/private/ssl.key
<Directory /톰캣폴더/webapps>
AllowOverride none
Require all granted
</Directory>
DocumentRoot /톰캣폴더/webapps/ROOT
JkMount /* worker1
</VirtualHost>
...(생략)
<Directory />
AllowOverride none
Require all granted
</Directory>
...(생략)
/etc/httpd/conf/httpd.conf 파일의 하단에 아래의 내용을 추가합니다.
# vi /etc/httpd/conf/httpd.conf... (생략)
<IfModule jk_module>
JkWorkersFile conf/workers.properties
JkLogStampFormat "[%a %b %d %H:%M:%S %Y] "
JkLogFile logs/mod_jk.log
JkLogLevel info
JkShmFile run/mod_jk.shm
JkMount /* worker1
</IfModule>
Apache 재시작
설정파일 변경 후, 변경한 내용을 반영하기 위해서 Apache 서버를 재시작합니다.
# service httpd restart
'Web Server > Apache' 카테고리의 다른 글
| ○ Apache 가이드 - 로드밸런싱 설정하기 (0) | 2020.07.06 |
|---|---|
| ○ Apache 가이드 - 설정파일 분석하기 (0) | 2020.07.05 |
| ○ Apache 가이드 - 설치부터 HTTPS 적용까지 (3) | 2020.07.05 |